Things I Found Interesting in June 2026
- Tea Cat
- Pixel Inspector
- Google Chat Mark all as Read
- Blackletter Lettering Embosser Stamp
- Fancy Circluar Picture Frame
- Better Git Commit Messages
- Zombie
Tea Cat

Pixel Inspector
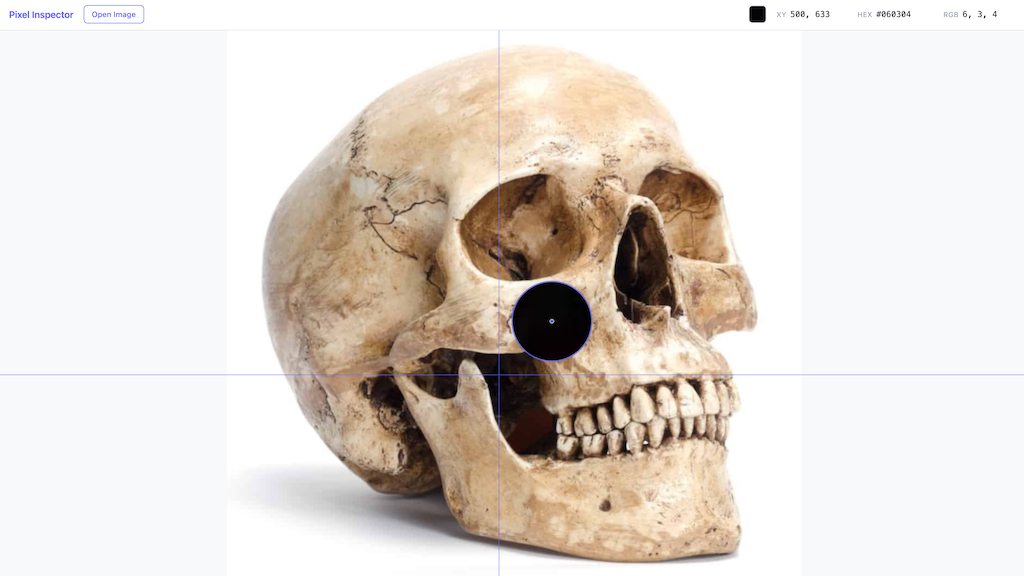
I'm not sure why some things need to be this hard, but sometimes I just want to know the pixel locations on an image. Drag image to browser, get pixel locations and colors.
Google Chat Mark all as Read
The problem with google chat is... wait let me just list the things google got right with google chat as that list will be shorter: . One of the problems with google chat is the Home screen which could have been a great single place to view new messages was ruined because google won't add a mark all as read button. Wouldn't it be great if you had a single pane of new messages, and not see messages from 2023?
Well wait no more, here is a Greasemonkey script that will mark all the message in Home as read so you can actually use Home to monitor chat. The real question is if I could do this in a few minutes, why couldn't google?
// ==UserScript==
// @name         Google Chat – Mark All as Read
// @namespace    https://chat.google.com/
// @version      2.0
// @description  Adds a floating button that marks every unread conversation as read
// @author       analog
// @match        https://chat.google.com/*
// @grant        none
// @run-at       document-idle
// ==/UserScript==

(function () {
  'use strict';

  // ── helpers ──────────────────────────────────────────────────────────────

  const sleep = ms => new Promise(r => setTimeout(r, ms));

  async function waitFor(predicate, timeout = 2000, interval = 80) {
    const deadline = Date.now() + timeout;
    while (Date.now() < deadline) {
      const result = predicate();
      if (result) return result;
      await sleep(interval);
    }
    return null;
  }

  // ── unread-item detection ─────────────────────────────────────────────────

  // Confirmed from live DOM inspection: data-is-unread="true" is the stable
  // attribute Google Chat uses on every unread conversation/thread card.
  function getUnreadItems() {
    return [...document.querySelectorAll('[data-is-unread="true"]')];
  }

  // ── click / hover helpers ─────────────────────────────────────────────────

  // Full mouse-event sequence with real coordinates for jsaction delegation.
  function jsClick(el) {
    const rect = el.getBoundingClientRect();
    const x = rect.width  > 0 ? rect.left + rect.width  / 2 : 1;
    const y = rect.height > 0 ? rect.top  + rect.height / 2 : 1;
    for (const type of ['mousedown', 'mouseup', 'click']) {
      el.dispatchEvent(new MouseEvent(type, {
        bubbles: true, cancelable: true, view: window,
        clientX: x, clientY: y,
        button: 0, buttons: type === 'click' ? 0 : 1,
      }));
    }
  }

  // PointerEvents (modern standard) + MouseEvents to trigger jsaction hover
  // handlers that reveal the inline action buttons.
  function jsHover(el) {
    const rect = el.getBoundingClientRect();
    const x = rect.left + rect.width  / 2;
    const y = rect.top  + rect.height / 2;
    for (const type of ['pointerover', 'pointerenter', 'pointermove',
                        'mouseover',   'mouseenter',   'mousemove']) {
      const Cls = type.startsWith('pointer') ? PointerEvent : MouseEvent;
      el.dispatchEvent(new Cls(type, {
        bubbles: true, cancelable: true, view: window,
        clientX: x, clientY: y,
      }));
    }
  }

  function closeMenu() {
    document.dispatchEvent(new KeyboardEvent('keydown', { key: 'Escape', bubbles: true }));
  }

  // ── mark a single item as read ────────────────────────────────────────────

  async function markItemAsRead(row) {
    row.scrollIntoView({ block: 'center' });
    await sleep(150);

    // Strategy 1 ─────────────────────────────────────────────────────────────
    // data-item="mark-thread-as-read" and "mark-as-read" are stable jsaction
    // identifiers. These buttons may be present in the DOM (even if visually
    // hidden); .click() fires on hidden elements.
    const dataItemBtn = row.querySelector(
      '[data-item="mark-thread-as-read"], [data-item="mark-as-read"]'
    );
    if (dataItemBtn) {
      console.log('[mark-all-read] S1: data-item button found, clicking');
      dataItemBtn.click();
      await sleep(300);
      return true;
    }

    // Strategy 2 ─────────────────────────────────────────────────────────────
    // Trigger hover events so jsaction reveals the inline action toolbar,
    // then look for aria-label="Mark as read" both inside the row and globally
    // (Google Chat sometimes renders action overlays outside the row element).
    jsHover(row);
    await sleep(400);

    let markBtn =
      row.querySelector('[aria-label="Mark as read"], [data-item="mark-thread-as-read"], [data-item="mark-as-read"]') ||
      document.querySelector('[aria-label="Mark as read"]');

    if (markBtn) {
      const rect = markBtn.getBoundingClientRect();
      console.log('[mark-all-read] S2: mark-as-read button found (visible:', rect.width > 0, ')');
      rect.width > 0 ? jsClick(markBtn) : markBtn.click();
      await sleep(300);
      return true;
    }

    // Strategy 3 ─────────────────────────────────────────────────────────────
    // Click the Options (⋮) button revealed by hover, then pick "Mark as read"
    // from the dropdown menu.
    const optionsBtn = row.querySelector('[aria-label="Options"]');
    if (optionsBtn) {
      console.log('[mark-all-read] S3: trying Options menu');
      jsClick(optionsBtn);

      const menu = await waitFor(() => document.querySelector('[role="menu"]'), 1500);
      if (menu) {
        const items = [...menu.querySelectorAll('[role="menuitem"], [role="option"]')];
        console.log('[mark-all-read] menu items:', items.map(el => el.textContent.trim()));
        const markRead = items.find(el => /mark.*read/i.test(el.textContent));
        if (markRead) {
          markRead.click();
          await sleep(200);
          return true;
        }
        closeMenu();
        await sleep(100);
      }
    } else {
      const btns = [...row.querySelectorAll('button, [role="button"]')];
      console.warn('[mark-all-read] S3: no Options btn; buttons in row:',
        btns.map(b => b.getAttribute('aria-label') || b.textContent.trim()).filter(Boolean));
    }

    // Strategy 4 ─────────────────────────────────────────────────────────────
    // Right-click context menu — contextmenu events propagate through jsaction
    // even from dispatchEvent, unlike CSS :hover.
    console.log('[mark-all-read] S4: trying contextmenu');
    const rect = row.getBoundingClientRect();
    row.dispatchEvent(new MouseEvent('contextmenu', {
      bubbles: true, cancelable: true, view: window,
      clientX: rect.left + rect.width  / 2,
      clientY: rect.top  + rect.height / 2,
      button: 2, buttons: 2,
    }));
    const ctxMenu = await waitFor(
      () => [...document.querySelectorAll('[role="menu"]')]
              .find(m => /mark.*read/i.test(m.textContent)),
      1500
    );
    if (ctxMenu) {
      const items = [...ctxMenu.querySelectorAll('[role="menuitem"]')];
      const markRead = items.find(el => /mark.*read/i.test(el.textContent));
      if (markRead) {
        markRead.click();
        await sleep(200);
        return true;
      }
      closeMenu();
    }

    console.warn('[mark-all-read] all strategies failed for:',
      row.id || row.dataset.groupId || row.textContent.slice(0, 60));
    return false;
  }

  // ── main loop ─────────────────────────────────────────────────────────────

  async function markAllAsRead(btn) {
    btn.disabled = true;
    btn.textContent = '⏳ Working…';

    const rows = getUnreadItems();
    console.log(`[mark-all-read] found ${rows.length} unread items`);

    if (rows.length === 0) {
      btn.textContent = '✅ All read';
      await sleep(2000);
      resetButton(btn);
      return;
    }

    let marked = 0;
    for (const row of rows) {
      const ok = await markItemAsRead(row);
      if (ok) marked++;
      btn.textContent = `⏳ ${marked}/${rows.length}`;
    }

    btn.textContent = `✅ Marked ${marked}`;
    await sleep(2500);
    resetButton(btn);
  }

  // ── floating button UI ────────────────────────────────────────────────────

  function resetButton(btn) {
    btn.disabled = false;
    btn.textContent = '✉ Mark all read';
  }

  function createButton() {
    const btn = document.createElement('button');
    btn.id = 'gchat-mark-all-read';
    btn.textContent = '✉ Mark all read';
    Object.assign(btn.style, {
      position:     'fixed',
      bottom:       '20px',
      right:        '20px',
      zIndex:       '999999',
      padding:      '10px 16px',
      background:   '#1a73e8',
      color:        '#fff',
      border:       'none',
      borderRadius: '24px',
      fontSize:     '13px',
      fontFamily:   'Google Sans, Roboto, sans-serif',
      fontWeight:   '500',
      cursor:       'pointer',
      boxShadow:    '0 2px 8px rgba(0,0,0,.35)',
      transition:   'opacity .2s',
    });

    btn.addEventListener('mouseenter', () => (btn.style.opacity = '0.85'));
    btn.addEventListener('mouseleave', () => (btn.style.opacity = '1'));
    btn.addEventListener('click',      () => markAllAsRead(btn));

    document.body.appendChild(btn);
    return btn;
  }

  // ── bootstrap ─────────────────────────────────────────────────────────────

  async function init() {
    await waitFor(
      () => document.querySelector('[data-is-unread="true"], [role="navigation"], nav'),
      15000,
      300
    );

    if (!document.getElementById('gchat-mark-all-read')) {
      createButton();
    }
  }

  init();
})();
Blackletter Lettering Embosser Stamp
Blackletter calligraphy looks neat, and what would look even neater would be an embossed stamp from some blackletter calligraphy. So I photobashed some letters I liked from online, traced them into an SVG, and then (a)I, created a python script to create plates for embossing/debossing the design.
The Design
The monogram is "MP" in a dense blackletter style — the kind of letterform that looks like it belongs on a medieval manuscript or a very serious beer label. The letters are drawn as stroked paths in an SVG, which means the geometry is a centerline with a width, not a filled outline. That distinction matters a lot for how the dies get generated.

How It Works
The core idea is simple: take the centerline paths from the SVG, extrude a triangular ridge along each one, union all those ridges onto a flat plate, and you have the male (embossed) die. For the female (debossed) die, mirror the design and subtract matching grooves into a second plate. Press paper between the two and you get a blind emboss.
The tricky part is the geometry. Stroked paths need to be expanded into 3D solids, and the joints at corners and curves need to be handled cleanly or you get self-intersecting meshes that boolean operations choke on. I ended up using miter frames at each vertex — computing a bisecting normal scaled by 1/cos(half-angle) — and clamping extreme miters to avoid spikes at sharp angles. manifold3d handles the boolean union/difference operations; it's dramatically more robust than OpenSCAD/CGAL for this kind of messy geometry.
The SVG paths are arc-length sampled (not uniform-parameter sampled), so curves get evenly-spaced points regardless of how a tool encoded the bezier. A few passes of Laplacian smoothing clean up any jitter before the 3D geometry is built.
The Result
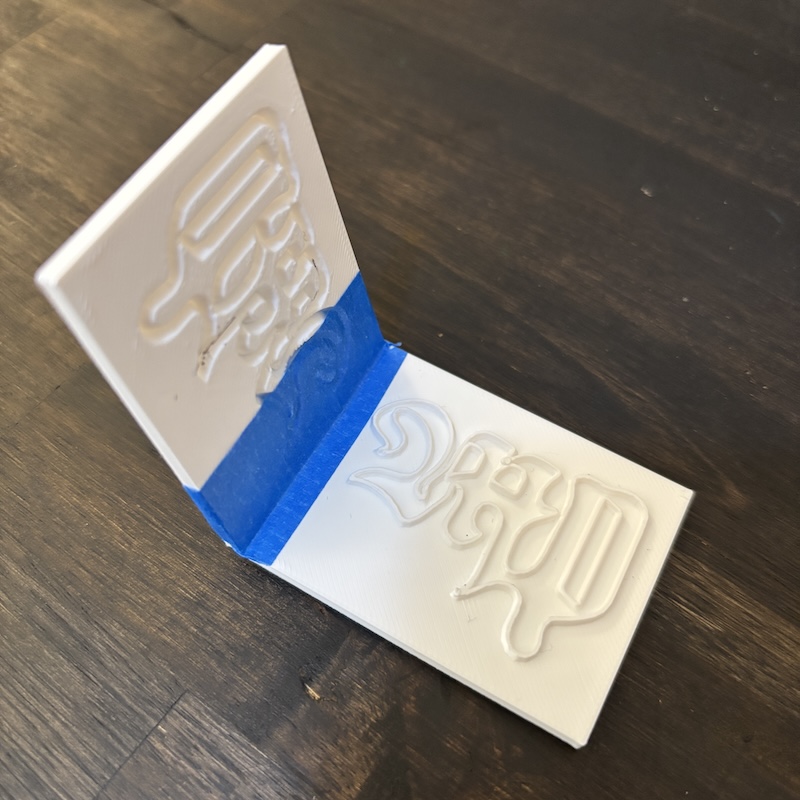
Here's the printed pair of plates — male die on top, female die on the bottom, held together with blue tape to test alignment:
And here's what it looks like pressed into paper:
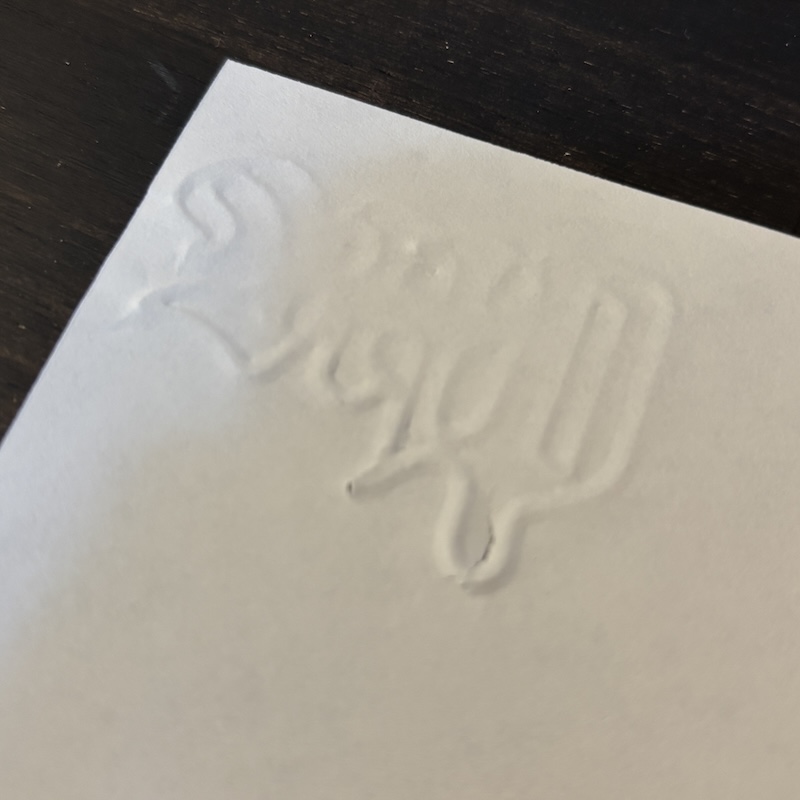
The emboss is clean and the letterforms read well. The triangular ridge profile gives a nice crisp edge to the raised paper rather than the rounded shoulder you'd get from a hemispherical cross-section.
Usage
The script takes an SVG file and outputs two STL files ready to slice and print.
pip install manifold3d svgpathtools numpy
python make_embosser.py <input.svg> [options]
| Option | Default | Description |
|---|---|---|
--plate-width |
100 mm | Width of the plate |
--plate-length |
80 mm | Length of the plate |
--plate-thickness |
3 mm | Plate thickness |
--stroke-width |
1.0 mm | Ridge base width |
--emboss-depth |
1.5 mm | Ridge height / groove depth |
--margin |
5 mm | Margin around the design |
--tolerance |
0.35 mm | Extra clearance on the debossed groove |
--samples |
200 | Points sampled per subpath |
--smooth |
2 | Laplacian smoothing passes |
--max-miter |
3.0 | Miter scale clamp at sharp corners |
--out-embossed |
embossed_plate.stl |
Output path for male die |
--out-debossed |
debossed_plate.stl |
Output path for female die |
The settings used for this monogram:
python make_embosser.py MP_blackletter.svg \
  --stroke-width 1.5 \
  --emboss-depth 2 \
  --plate-width 60 \
  --plate-length 48 \
  --tolerance .45
The higher tolerance (0.45 vs the 0.35 default) accounts for FDM dimensional variation — tight enough that the plates register well but loose enough that they don't bind.
The Files
- make_embosser.py the python script to create the plates.
- Makefile a simple makefile to call the script
- MP_blackletter.svg the svg file I used to create the plates.

Openscad
I tried using openscad to do this, and got some results, but when I was trying to get fancier to get sharper edges I kept running into geometry errors in the solver, it would show a preview, but couldn't actually generate the final results; thus the python program to do it instead.
Fancy Circluar Picture Frame
playing with profiles
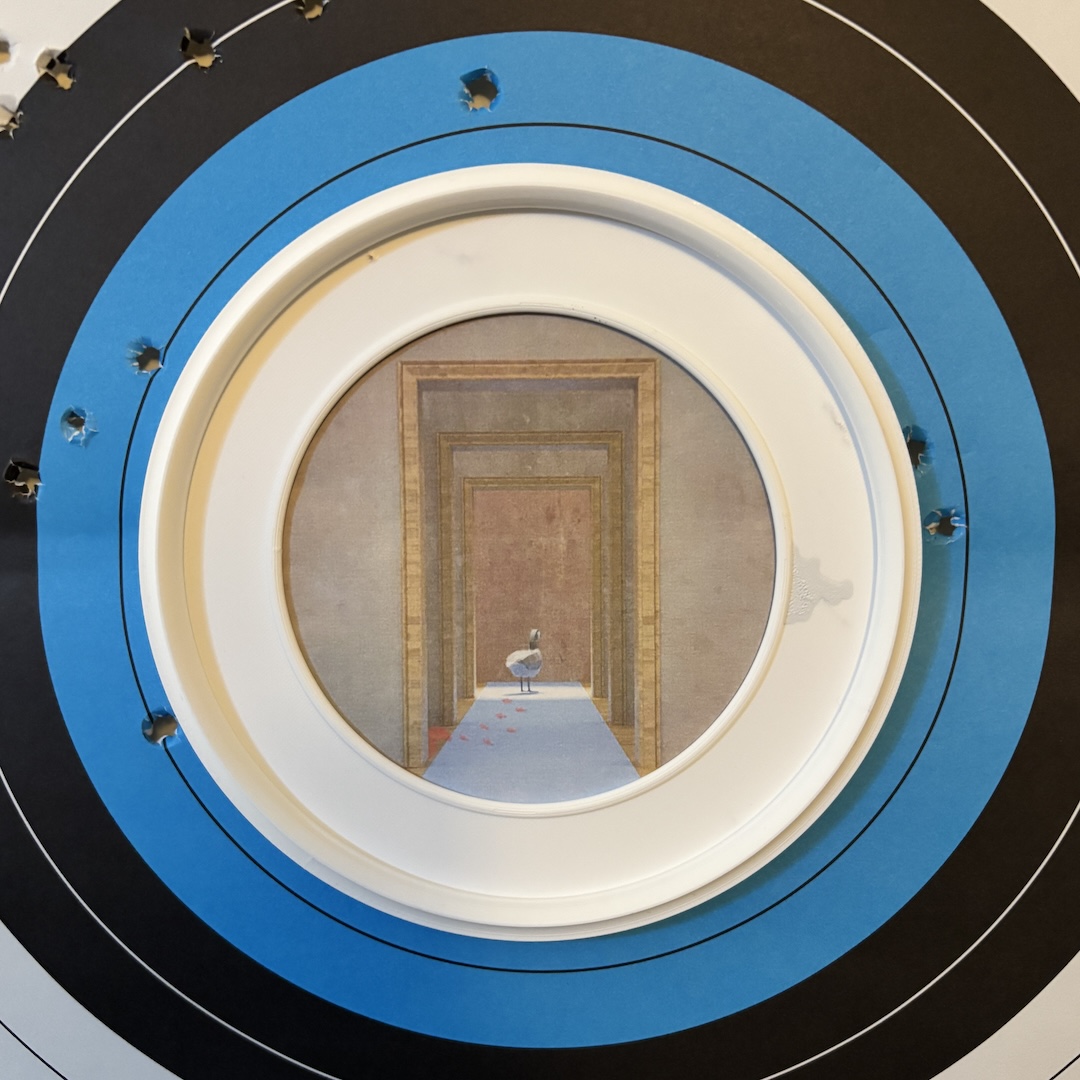
A quick study of molding profiles
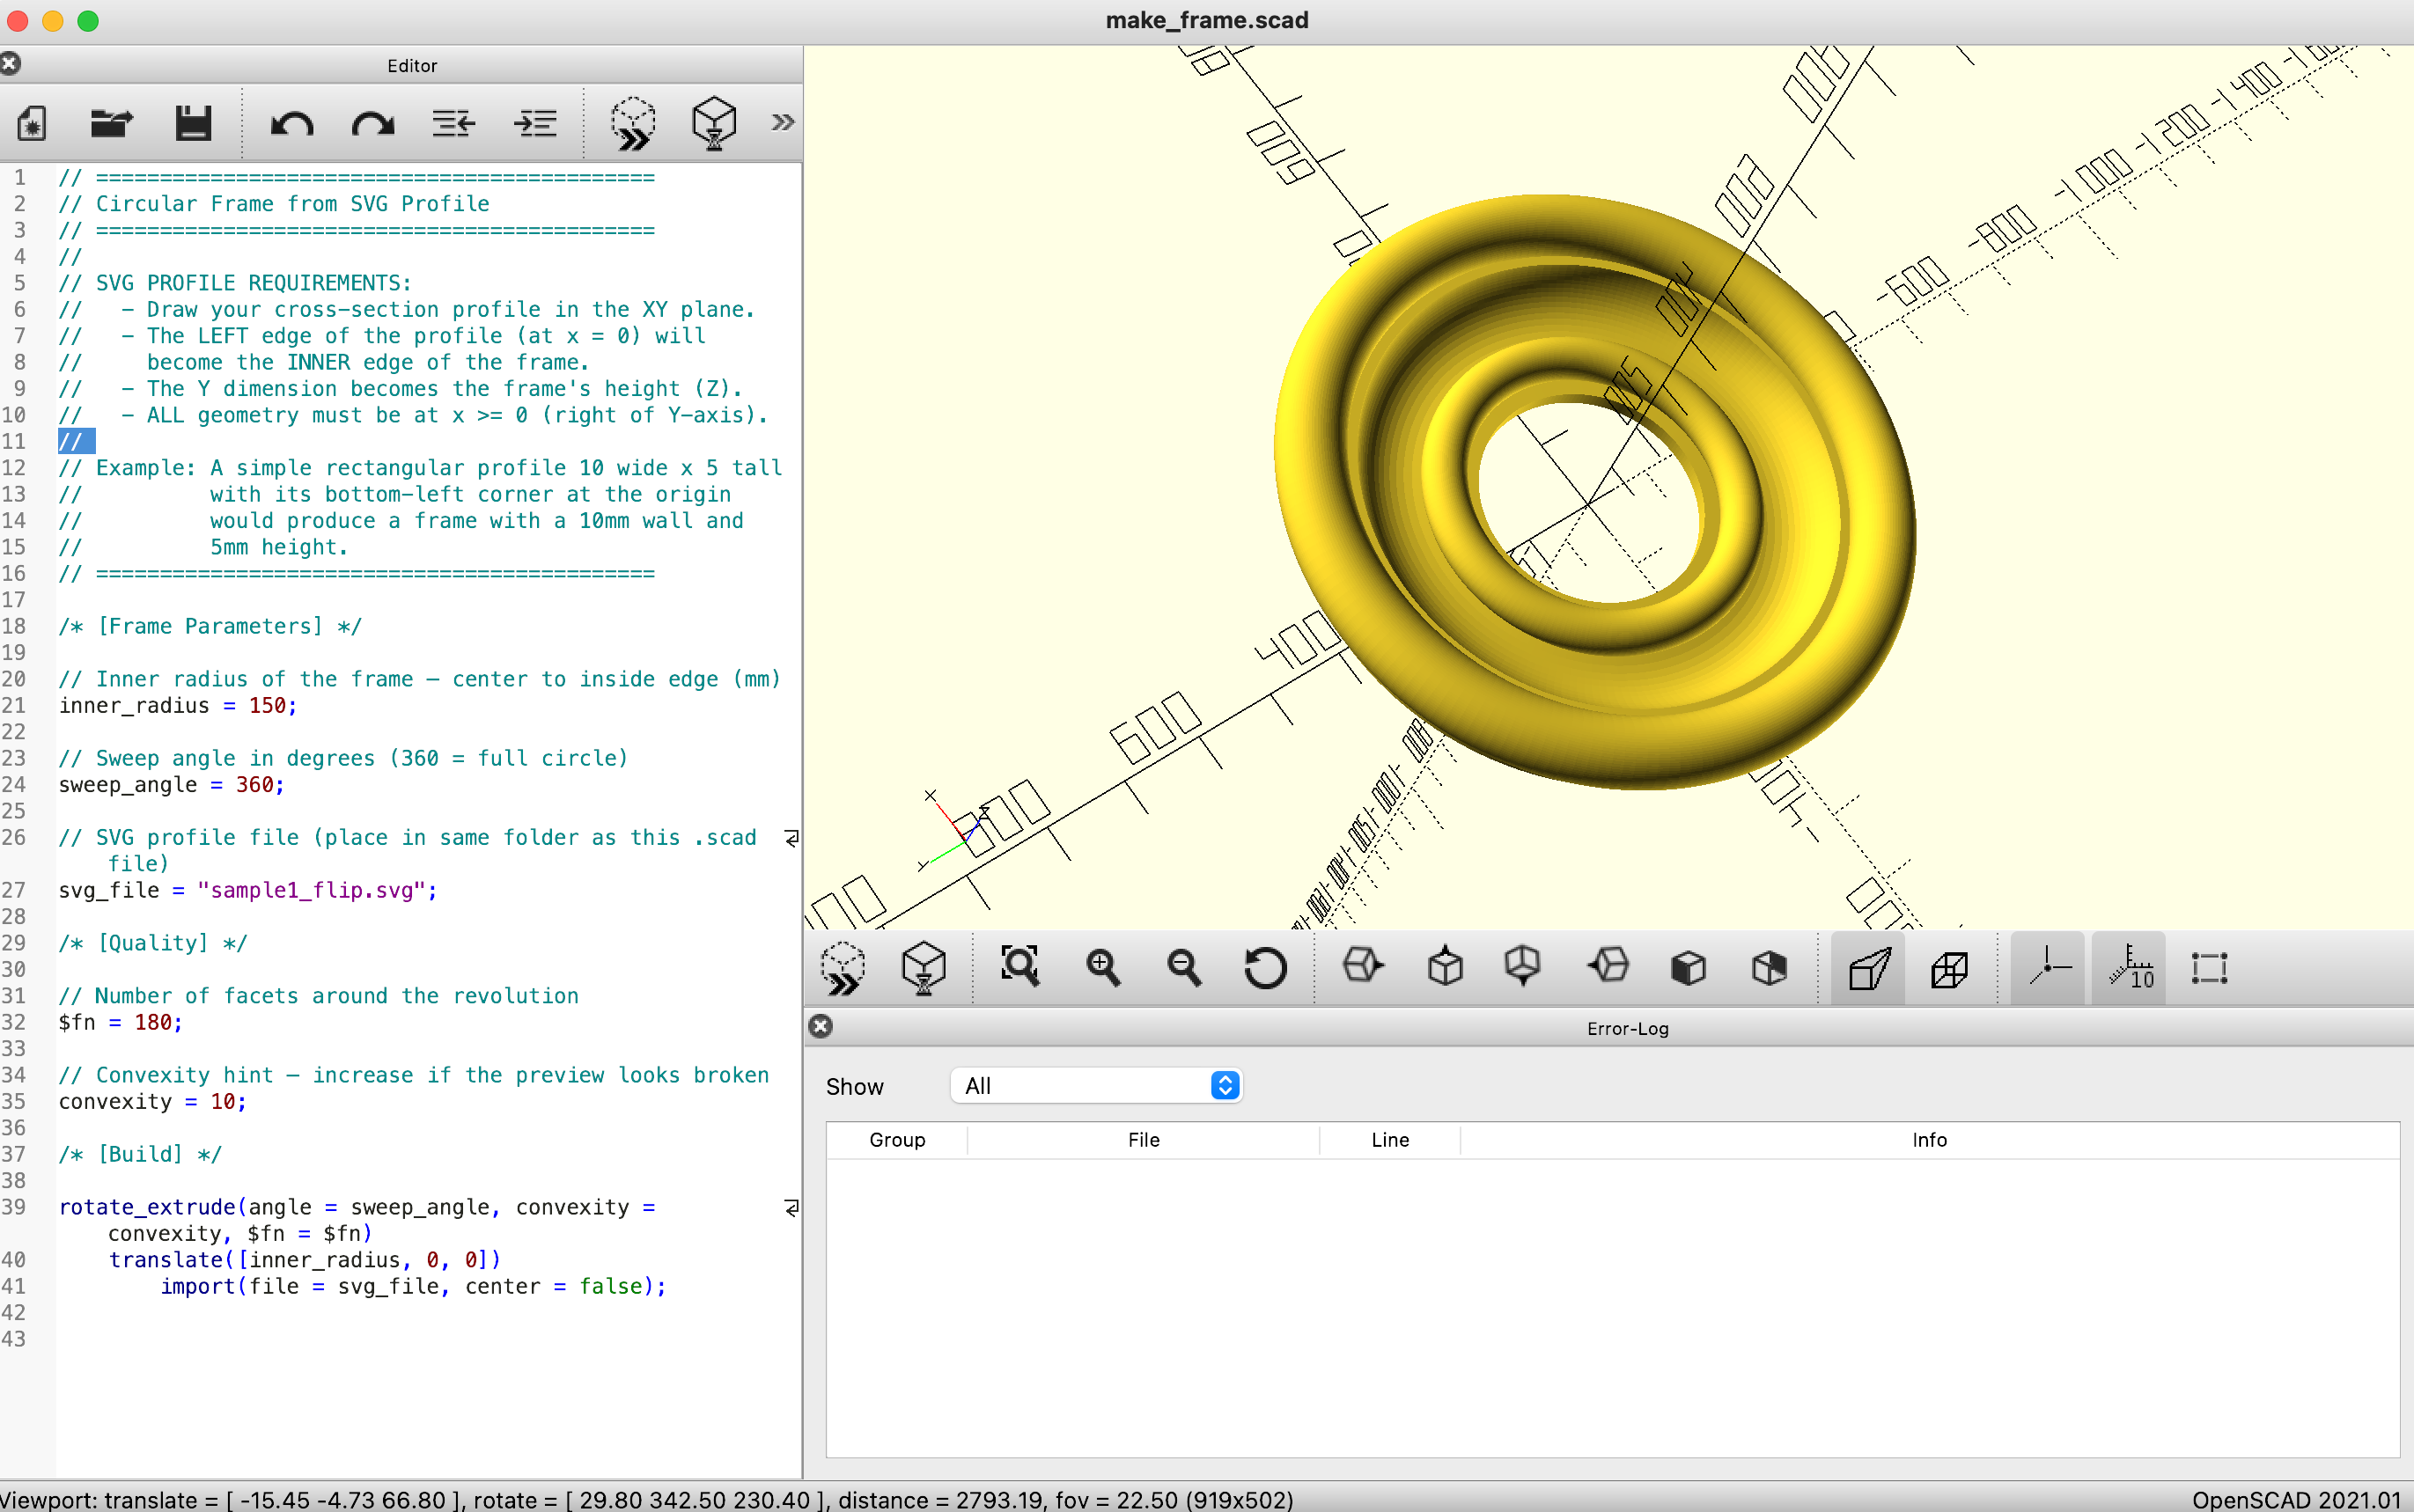
What makes a good profile for a frame? That question really depends on how gaudy you want your frame to look. In looking into this, (A)I created a script in openscad that will take an SVG and convert it to a frame; you can specify how many sides the frame has, 4, 8, or 180 if you want a circular frame, and it'll take your SVG shape and rotate it around the circle.
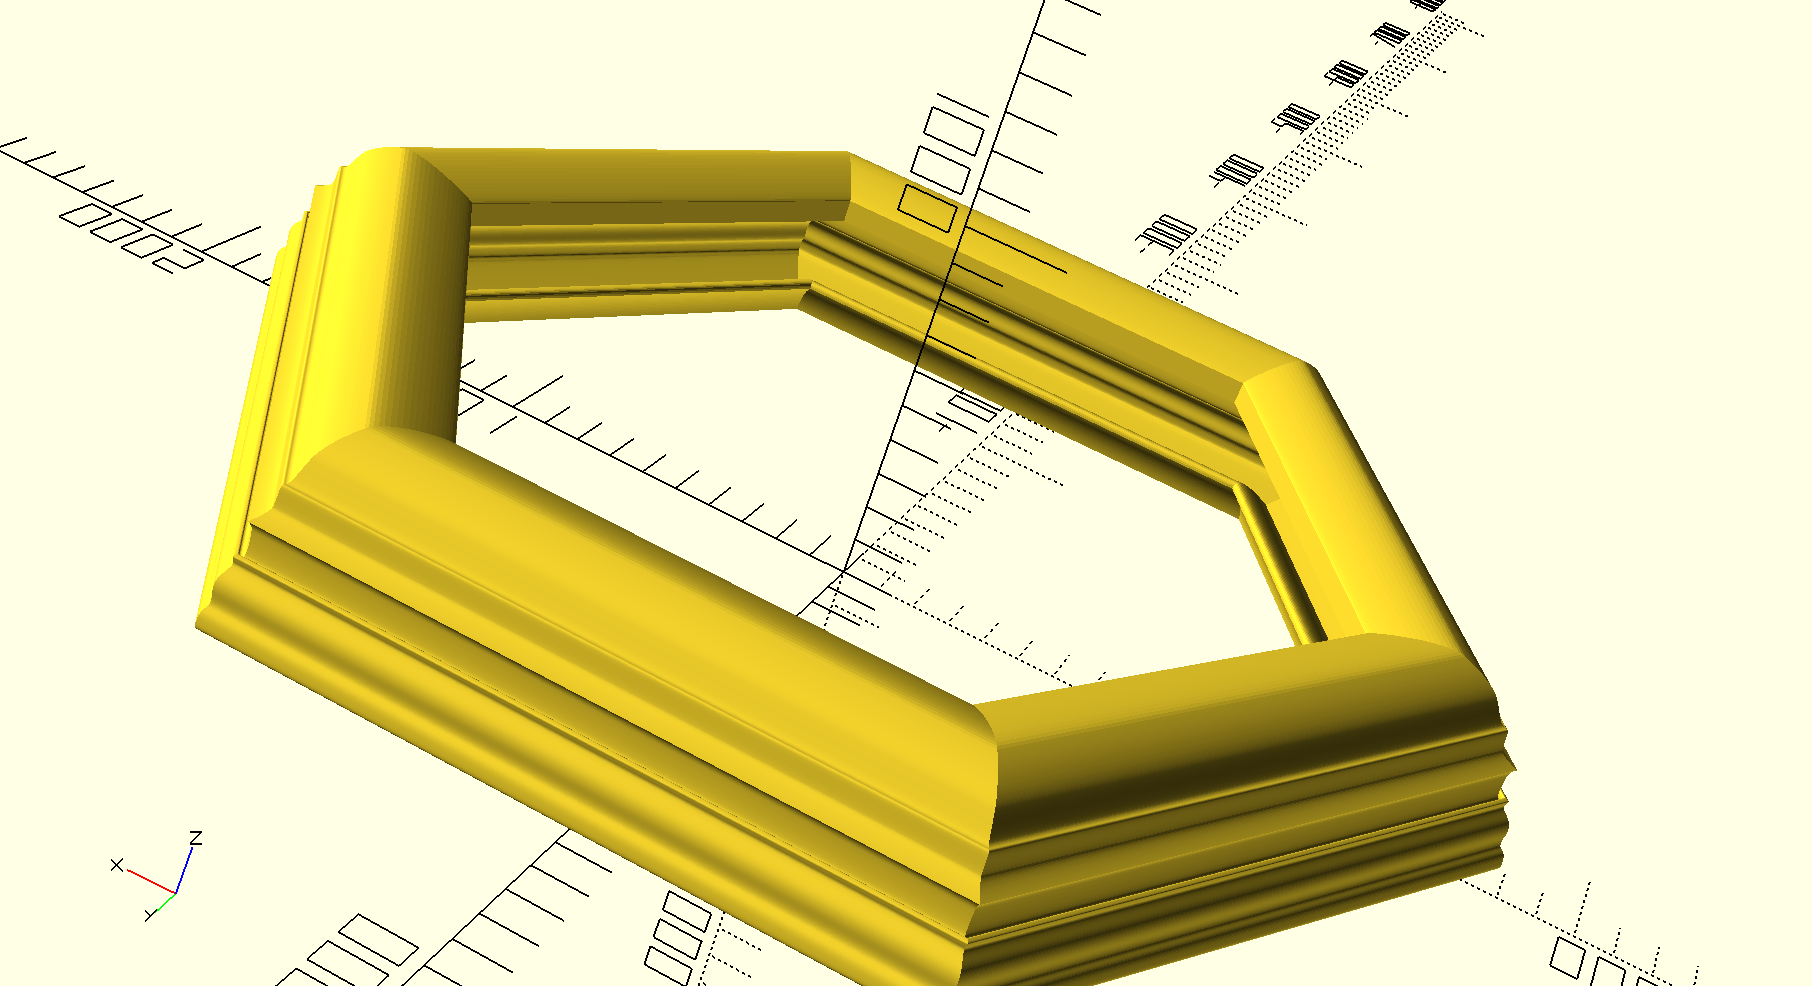
Profiles are abound on the internet, this site has an SVG download of many different profiles you can play with. I tried to get fancy by using a skull outline, but it really didn't look like much:
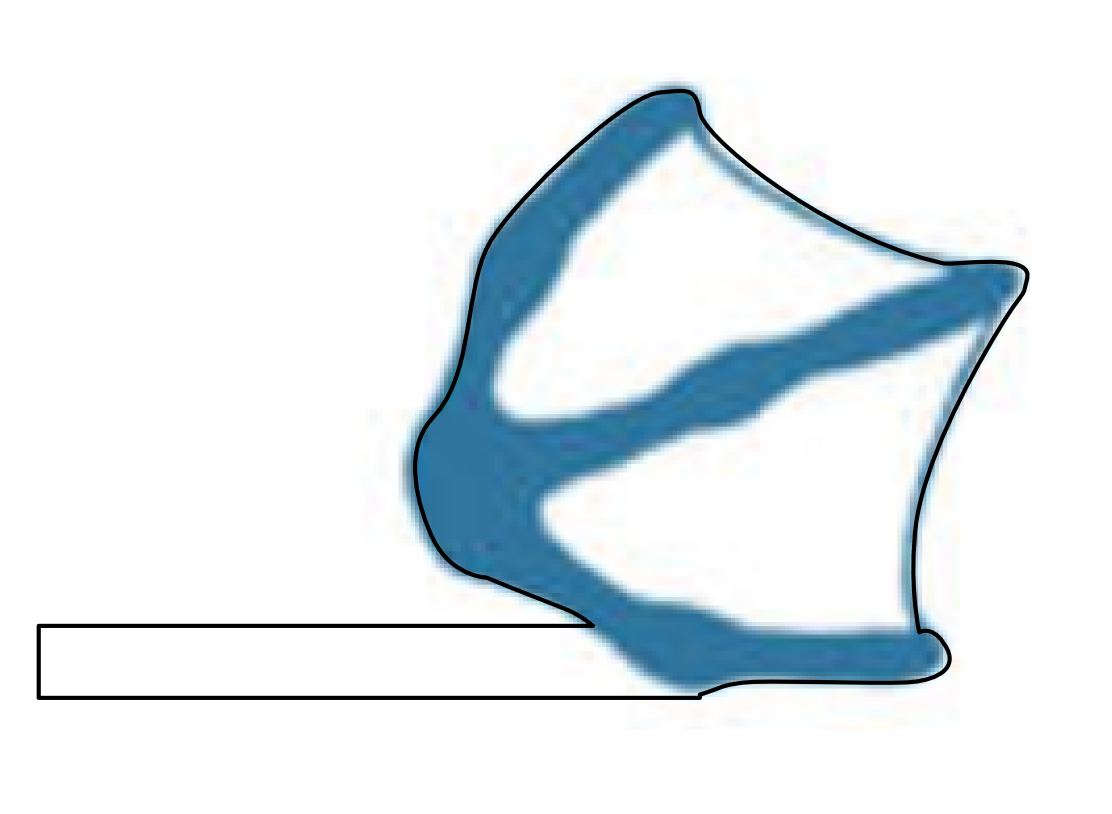
In the end, I was framing a goose, so I took the outline of the goose foot, and used that as the profile for the molding:
Initially I was doing this in Blender, but it was kind of a hassle, and the openscad workflow is much quicker and reproducible.
Better Git Commit Messages
Are you tired of your git commit history looking like this:
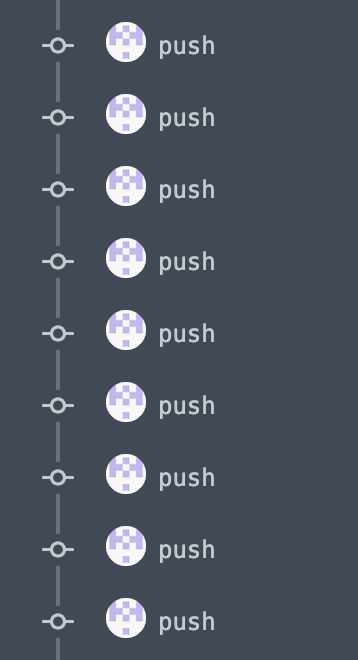
That's why (A)I came up with wonderful git push script. Instead of pushing the same word over and over for your commit, you can have a little story unfold every time you push a change.
function gp {
  local branchName=$(git branch 2>/dev/null | grep '^*' | colrm 1 2)

  if [ "$branchName" = "master" ] || [ "$branchName" = "main" ]; then
    echo "Don't push to master/main"
    return
  fi

  # Load story from ~/.storygit, or seed a default one
  local story_file=~/.storygit
  if [ ! -f "$story_file" ]; then
    echo "Once upon a time in a land far far away there lived a brave developer who pushed code every single day through rain and snow and bugs galore they never stopped exploring more the functions grew the tests all passed and every deploy was built to last so commit by commit the tale was spun a never ending story of code well done" > "$story_file"
  fi
  local story=$(cat "$story_file")
  local total=$(echo "$story" | wc -w | tr -d ' ')

  # Detect base branch
  local base_branch="master"
  git show-ref --verify --quiet refs/heads/main && base_branch="main"

  # Dynamically count commits on this branch since it diverged from base
  local count=$(git rev-list --count "${base_branch}"..HEAD 2>/dev/null || echo 0)

  # Pick the next word (wraps around if story is shorter than commit count)
  local index=$(( (count % total) + 1 ))
  local word=$(echo "$story" | tr -s ' ' '\n' | sed -n "${index}p")

  git commit -am "$word"
  echo "📖 word ${index}/${total}: \"$word\""
  git push --set-upstream origin "${branchName}"
}
Now when I mindlessly commit, it tells a little story along the way; that's assuming you actually commit more than the once thing AI writes for you these days.
Zombie